
Add a New Message Using a Custom Letter
You will sometimes need to write a personal letter to a correspondent, so it is necessary to know how to create a Custom Letter. As with Form Letter Messages, you will first begin by locating or creating a Contact record for the recipient.
Add a New Message from a Contact Record
When sending a Message, you will need to start from a Contact record for the correspondent. If your search returns an existing Contact, you can start a new Message from the in-row action for that Contact. If your search does not return an existing Contact, you will create the Contact record and start your Message from within the new Contact.
New Message from an Existing Contact

1.Select the +Message in-row action for the existing Contact. (IQ opens the Message record)
New Message from a New Contact
1.Open the Action menu inside the Contact record and select New Custom Message. (IQ opens the Message record with the Default Custom Letter Template selected in your IQ User Preferences)

Whether you begin from an existing Contact record or from a new Contact record, the Message record page appears. If you selected New Custom Message from the new Contact record, an editor will automatically open allowing you to begin typing. Note
|
Important Note: |
|
Whether your letter opens in MS Word or in the HTML editor is determined by the Default Custom Form Letter assigned to you in your IQ User Preferences. To change this, contact your System Administrator. The HTML Editor version is displayed below. |
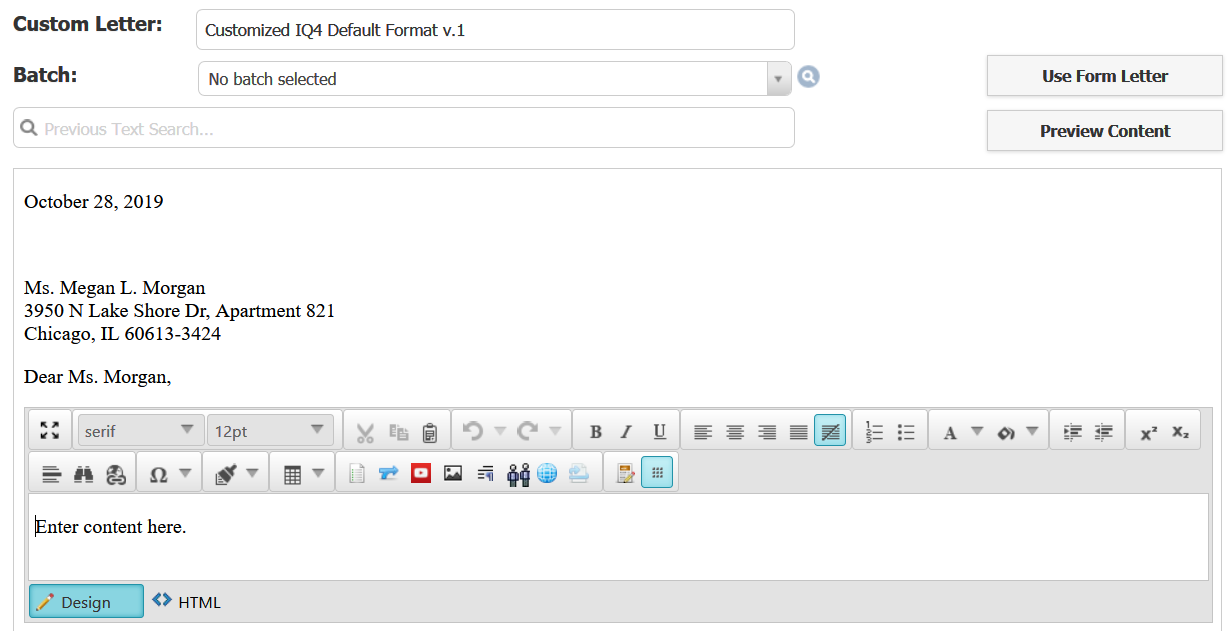
2.Type the body of your letter in the editor that opens. For best results, you should plan to do all your formatting in the editor. HTML editors are best for sending Messages by email, and are formatted to work with most email clients. MS Word provides a great deal more formatting capability, and is good for printed letters, however the formatting from MS Word can sometimes render unpredictably in many email clients.
3.Once you have finished editing and formatting your custom letter, click the Save button.
4.Select the Outgoing method.
5.If you select Email for the Outgoing method, IQ displays the From and To fields. Note: If you have access rights to change the From email address, you can select a default in your IQ User Preference and also select from a list of other email addresses in the From field.
6.Type a Subject if the message will go out by email.
7.Add Attachments if you would like to include an outgoing file with an email. Attachments are not printed with a Message going out by US Mail, but it can be useful to attach the file for historical purposes.
8.Enter Issue Codes. For non-Service-related Messages, Issue Codes can be critical. Issue Codes can be tracked for analysis.
9.The Custom Letter field will be populated with Customized Custom Letter Format (where "Custom Letter Format" is the name of the selected Default Custom Letter Format in your IQ user Preferences).
10.The Status field defaults to "On Hold" for a custom letter. Depending on your office's business process, you will either select "Request Approval" or leave it as "On Hold" for another user to review. Or if you have rights, you may select Approve and the either Send the Email or Print for USMail.
Copyright © 2020 Leidos Digital Solutions, Inc (DSI)