
Add Announcements
You can add system-wide Announcements from the Shortcuts menu if your user rights allow you to do so.
1.Click the Shortcuts link located above the menu and select Announcements.
2.Use the filters and row actions to sort and edit existing Announcements.
3.To create a new Announcement, click the Add Announcement button at the top of the List View.
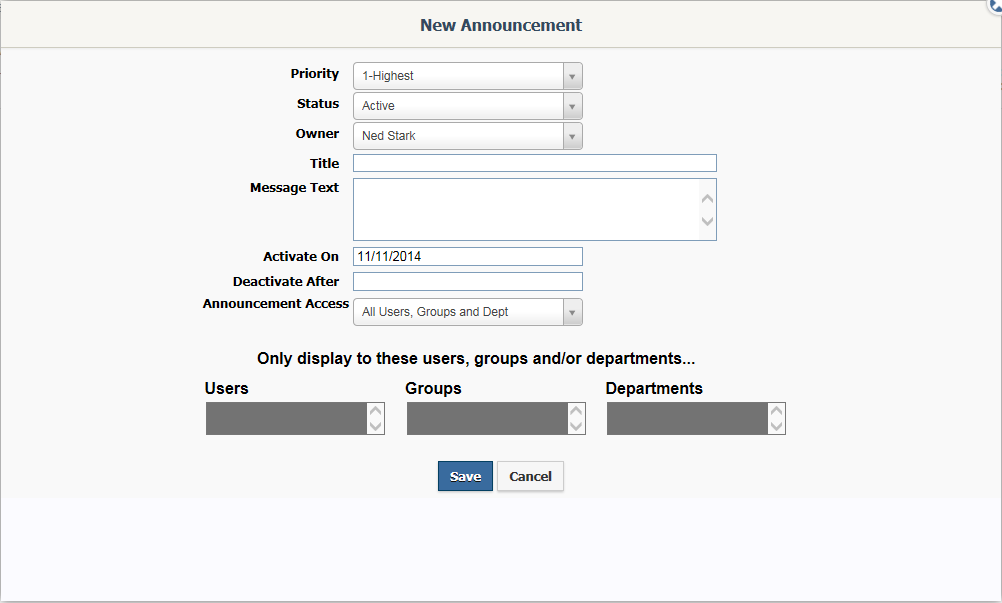
5.Set the Priority Level. This field in part determines the order of the Announcements on a list.
6.The Status should be Active. You can change an Announcement to Inactive manually when you are finished with it. You can also set the Deactivate After Date to have IQ automatically inactivate an Announcement.
7.Your User ID should appear in the Owner field. If you wish to have another IQ User own this Announcement, you may select from the list.
8.Enter the Title of the Announcement.
9.Enter the Message Text. Note: This is an HTML field with a popup tool bar with buttons for Bold, Italics, Underline, Text Color, Background Color, insert/edit Hyperlink, Bullets and Numbered Lists, and insert/edit IQ Image.
10.To activate the Announcement at a future date, enter that date in the Activate On field.
11.If you want IQ to automatically deactivate the Announcement on a particular date, enter that date in the Deactivate After field.
12.To limit the display of the Announcement to selected IQ Users, select Specific Users, Groups and/or Dept in the Announcement Access field.
13.Select the specific Users, Groups, or Departments from the fields that appears.
14.Click the Save button to save your Announcement.
To edit an Announcement, click the Title of the Announcement to open the record. Make any changes you wish.
Copyright © 2020 Leidos Digital Solutions, Inc (DSI)