
Create Events
You can create Calendar Events in IQ4. Using the IQ Events module, you can create and track events by location, topic, date, and calendar. IQ's Events module allows you to search history on an event, or to run reports on Events in the past based on the topic, the location, or attendees. You can add Contacts to an Event in order to send invitations or thank you notes.
1.Open the Events Menu, and select the Event link in the New column.
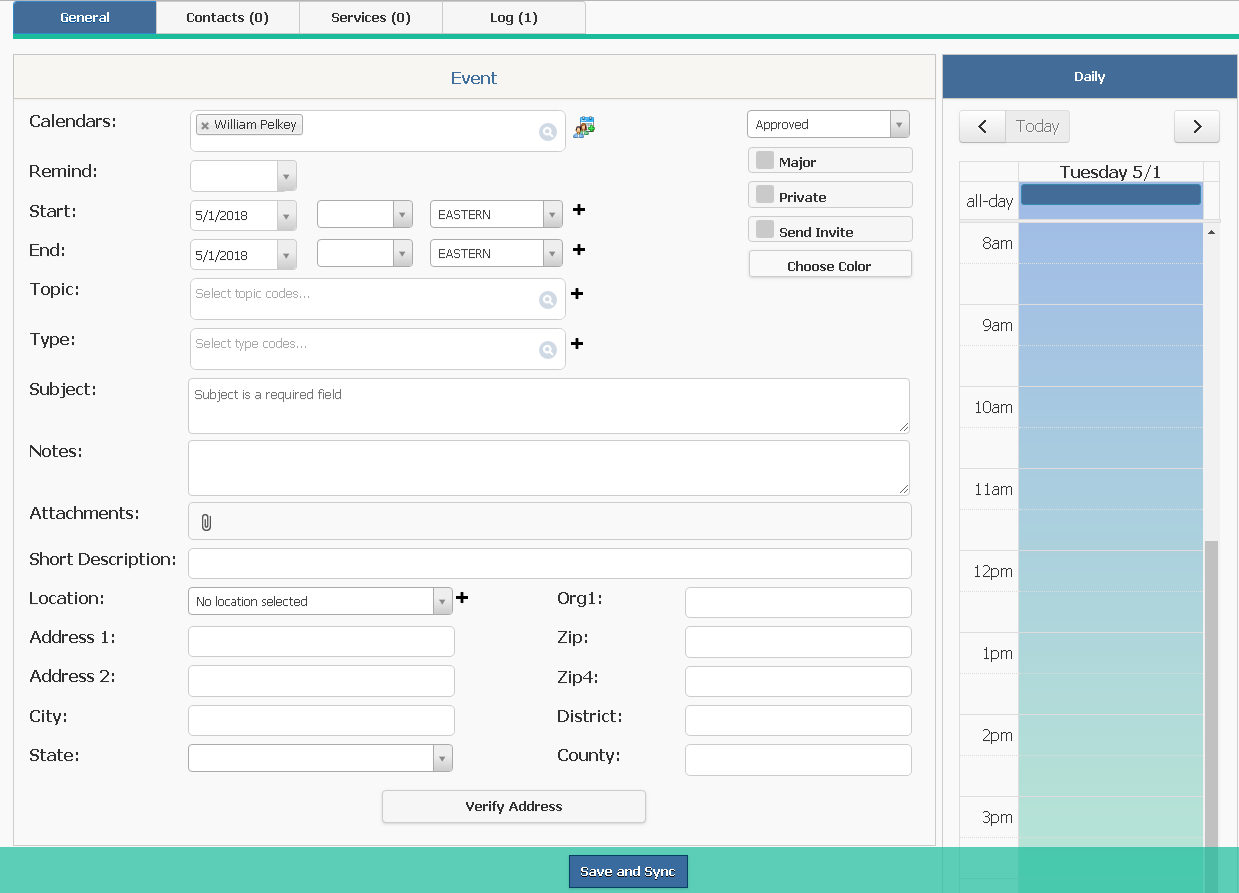
2.The default calendar(s) selected in your IQ User Preferences appears in the Calendar field. If needed, click in this field to select additional calendars you have access to. Click the Group icon to select a group of calendars.
3.If needed, type or select a date in the Remind field. IQ creates a background job, which will send a Reminder Alert to the IQ User associated with each selected Calendar(s) for this Event.
4.The Start Date defaults to today's date. Change the Start Date to the date of your Event.
5.Select the Start Time from the drop-down menu.
6.The Time Zone defaults to the selected Time Zone in your IQ User Preferences.
7.The End Date defaults to the Start Date. Change the End Date if the Event is a Multi-Day Event.
8.Select the End Time from the drop down menu.
9.Select Topic and/or Type codes related to this Event.
10.The Subject field is required. Enter a Subject of the Event up to 4000 characters.
11.Enter Notes for additional information about the Event up to 4000 characters. You can apply Bold, Italic, Underline or change the Text or Background color using the popup tool bar.
12.Use the Attachments field to attach files.
13.The Short Description field is limited to 50 characters and is used for the Monthly calendar report.
14.Enter a Location either by clicking in the field and selecting a location code, which will then populate the address fields, or you can manually populate the address fields. Note: The location will appear as hover text in the Daily, Weekly, and Monthly views, as well as on Event reports. Use the Verify Address to run address checker on the location.
15.By default, the Event status will be Approved. Click in the field and select another status if needed.
16.If the Event is a Major Event, check the box. This will display the Event in bold text in the Event List results and in reports.
17.If the Event is Private, check the box. This will hide the Event from users that do not have permission to view Private Events.
18.Select the Send Invite checkbox to send an Outlook invitation.
19.Select the Choose Color button to color code the Event.
20.Use the Save button to save this Event in IQ.
21.Use the Save and Sync button to both save this Event in IQ, and synchronize this Event with Outlook calendar.
Copyright © 2020 Leidos Digital Solutions, Inc (DSI)