
Create an eNewsletter
Creating an eNewsletter is a four step process. First, you select an existing saved template created for your office or use one of the basic templates provided by IQ. Then you can enter content such as images, videos, text, eSurveys, or eForms. Once the content is complete, you can select an audience. This is a list of Contacts to whom you will send the eNewsletter. When the Contact list is correct, you can build the eNewsletter and send it by email.
1.In the Outreach menu, select eNewsletter in the New column.
2.Select one of the templates under Saved Templates or Basic Templates.
3.IQ opens the eNewsletter wizard in the Content step and populates the Name field with a default name. You may remove it and enter a more meaningful name.
4.Type or paste the eNewsletter content into the Banner, Menu, Body or Footer section by clicking into the section.
|
Important Note: |
|
If you are copying content for your eNewsletter template from a Word document or a website, it is recommended that you strip out all the formatting in the content and reformat using the HTML editor. Microsoft Word and web pages contain hidden formatting that will not render predictably in all email clients. The best practice is to handle all formatting within the HTML editor. To strip out formatting, use the Paste as Text option |
5.When you are finished entering and formatting the content, click the Select Audience button to go to the next step.
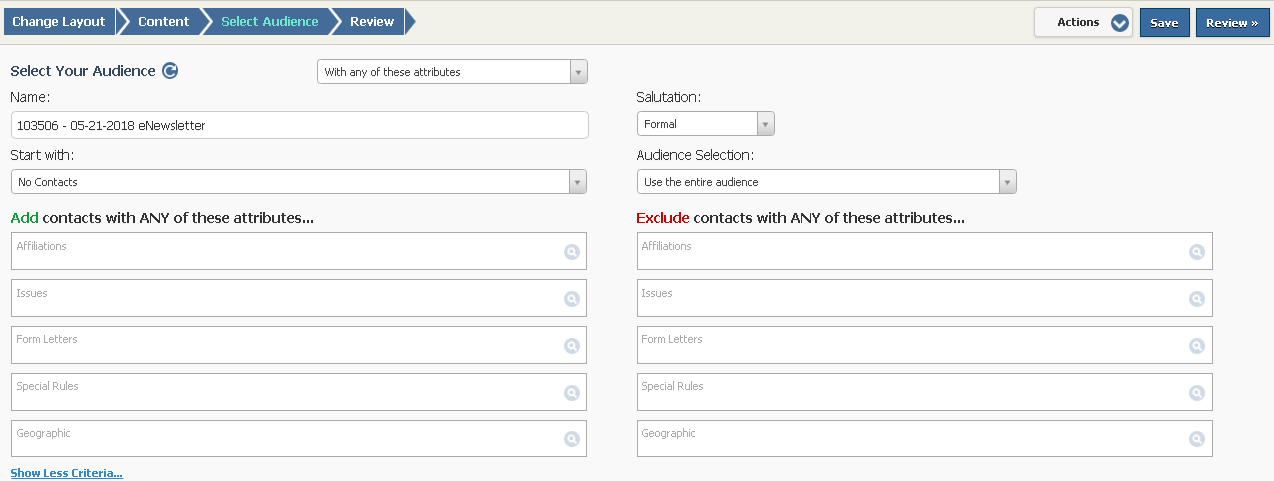
6.The Start With field defaults to No Contacts, which means you will need to select criteria such as Affiliations, Issues, etc. to select your Audience. Or if there is an existing saved List of Contacts, you may select it by clicking in the Start With field. There is also an option to "Create New List' using the Select Processor.
7.Select any criteria you want to use to include Contact records in the Add contacts with ANY of these attributes field.
8.Select any criteria you would like to use to exclude Contact records in the Exclude contacts with ANY of these attributes field. Note: If you want to use this selection of Affiliation, Issue codes, etc. as a default for exclusions, select Set Default Exclusions under the Actions menu.
9.Click the Review button to go to the next step.
10.Enter a Subject line for the eNewsletter. Note: this field is required. IQ will not allow you to send the outreach without entering a subject line.
11.Add any additional relevant information you feel is appropriate such as Issue Codes, Bill Information, and Bill Position.
12.In the Start field, select one of the following options: Build Only, Build and Send or Build and Send Immediately. Note: If you select "Build and Send Immediately", you will not be able to continue to work in IQ until the newsletter has been sent. As such, you should select "Build and Send" if the newsletter is being sent to more than 10,000 contacts.
13.If you want to schedule the "Build Only" or "Build and Send" for another date and time, enter the date in the first field and the time in the second field.
14.If you selected "Build Only", select the Build button. If you selected "Build and Send", select the Send button. If you selected "Build and Send Immediately", select the Send Now button.
15.IQ displays the Status page with Delivery Status: Queued for Build Only (or Build and Send) and a link to Cancel the eNewsletter.
1.From the Outreach menu, select either My Open or All Open in the Find Outreach column.
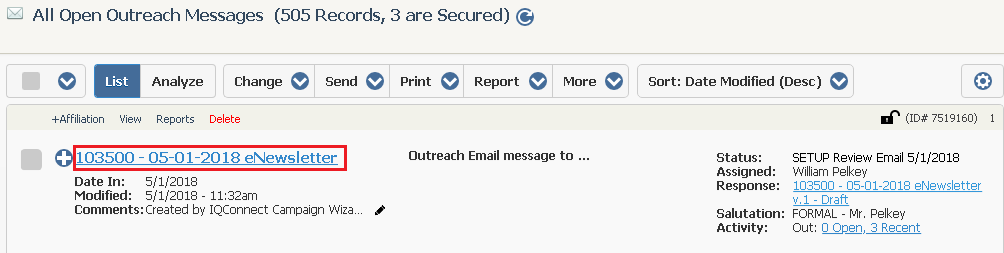
2.When you locate the eNewsletter you would like to edit or send, click the eNewletter name link.
3.The eNewsletter wizard opens in the last step you were in. Use the navigation buttons Change Layout, Content, Select Audience or Review to go to a specific step.
4.Once you have completed the changes, it is recommended you preview the Outreach before sending it. In the Review step, select Preview in the Actions menu. You can also review the content by clicking the Preview in-row action button when navigating to a list results page of eNewsletters. This will open a dialog box which allows you to input multiple email accounts to send the eNewsletter for review. Note: This must be done before the Build process begins.
5.When you are ready to send, and all steps have been completed, select the Send button. Note: IQ users who are required to request approval for Form Letters or Messages will not be able to send the eNewsletter until it has been approved.
Published eNewsletters
Once the eNewsletter is sent from the Wizard, it's automatically published and included on the RSS feed. You have the option to remove it from the RSS Feed.
Remove eNewsletters from RSS Feed:
1.Open the Outreach menu and select All Published eNewletters.
2.Locate the eNewsletter you would like to remove and select the Remove From RSS in-row action.
Add eNewsletter to RSS Feed
Once an eNewsletter has been removed from RSS Feed, possibly for updated information, you can add it back to the RSS Feed.
1.Open the Outreach menu and select My Open or All Open.
2.Locate the eNewsletter you would like to add to RSS Feed and select the Add to RSS in-row action.
Monitoring eNewsletter View Rates
Once an eNewsletter has been sent, you are able to check the view rates. The view rates for the most recently sent eNewsletter appears on the Home Page in the eNewsletter tile. You can also see the view rates associated with each eNewsletter in the eNewsletter List page.
1.To monitor view rates for an eNewsletter, locate the eNewsletter, and select the Report in-row action.
2.The Analysis Report in the first portion of the report displays links to specific recipient groups. Click the links to locate the Total Sent and Delivered, Non-Delivered eNewsletters and more.
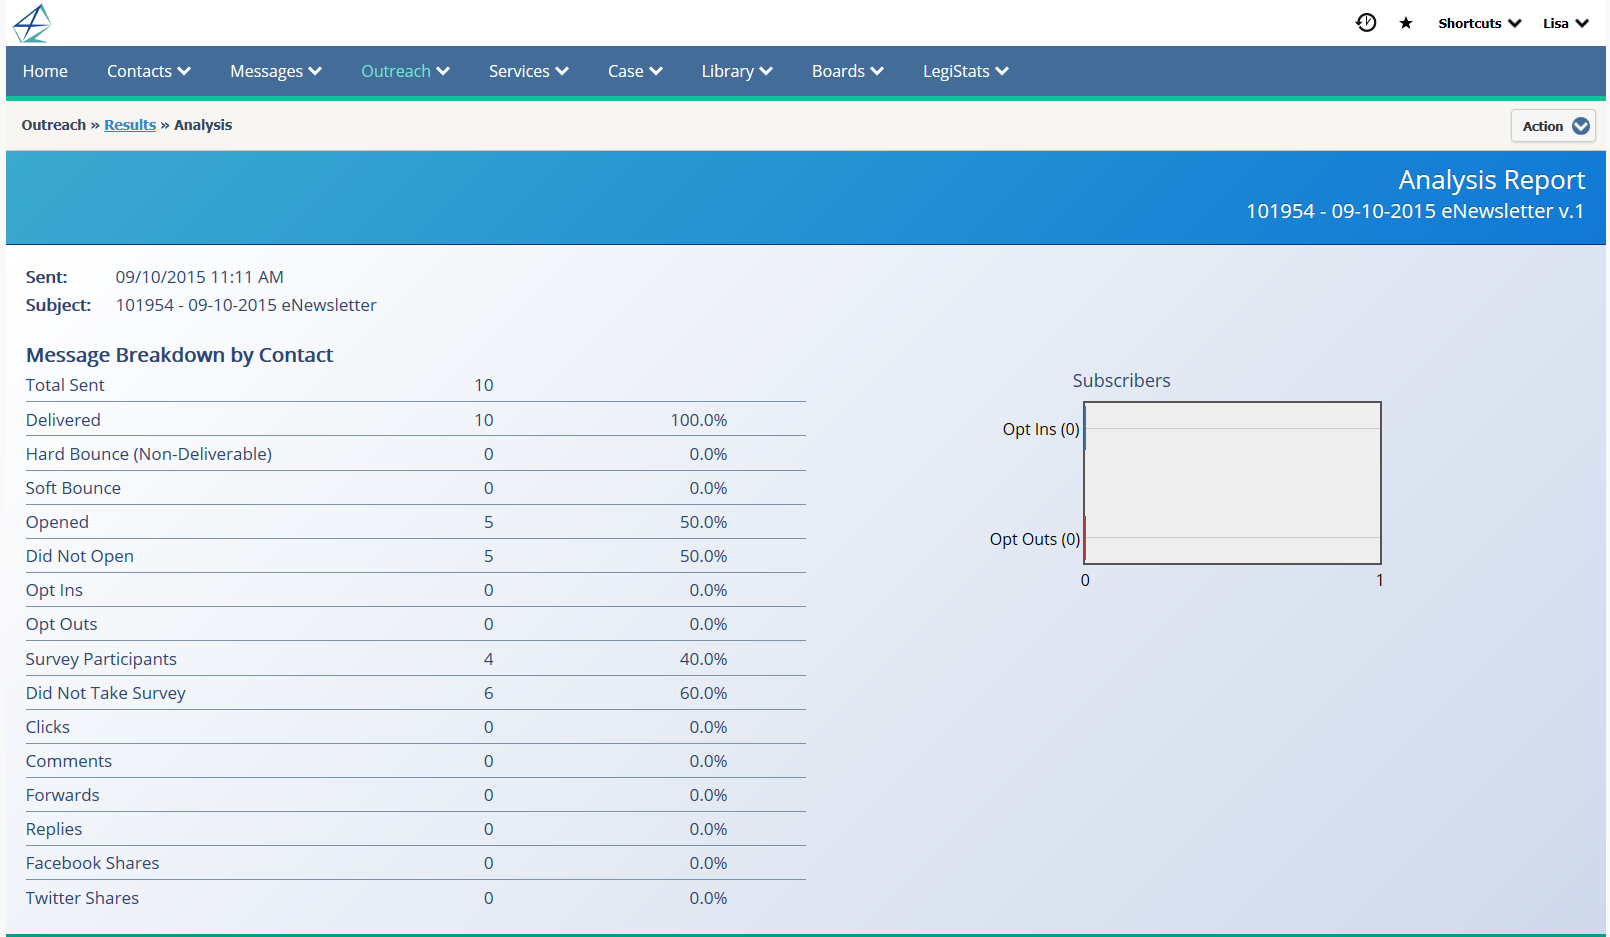
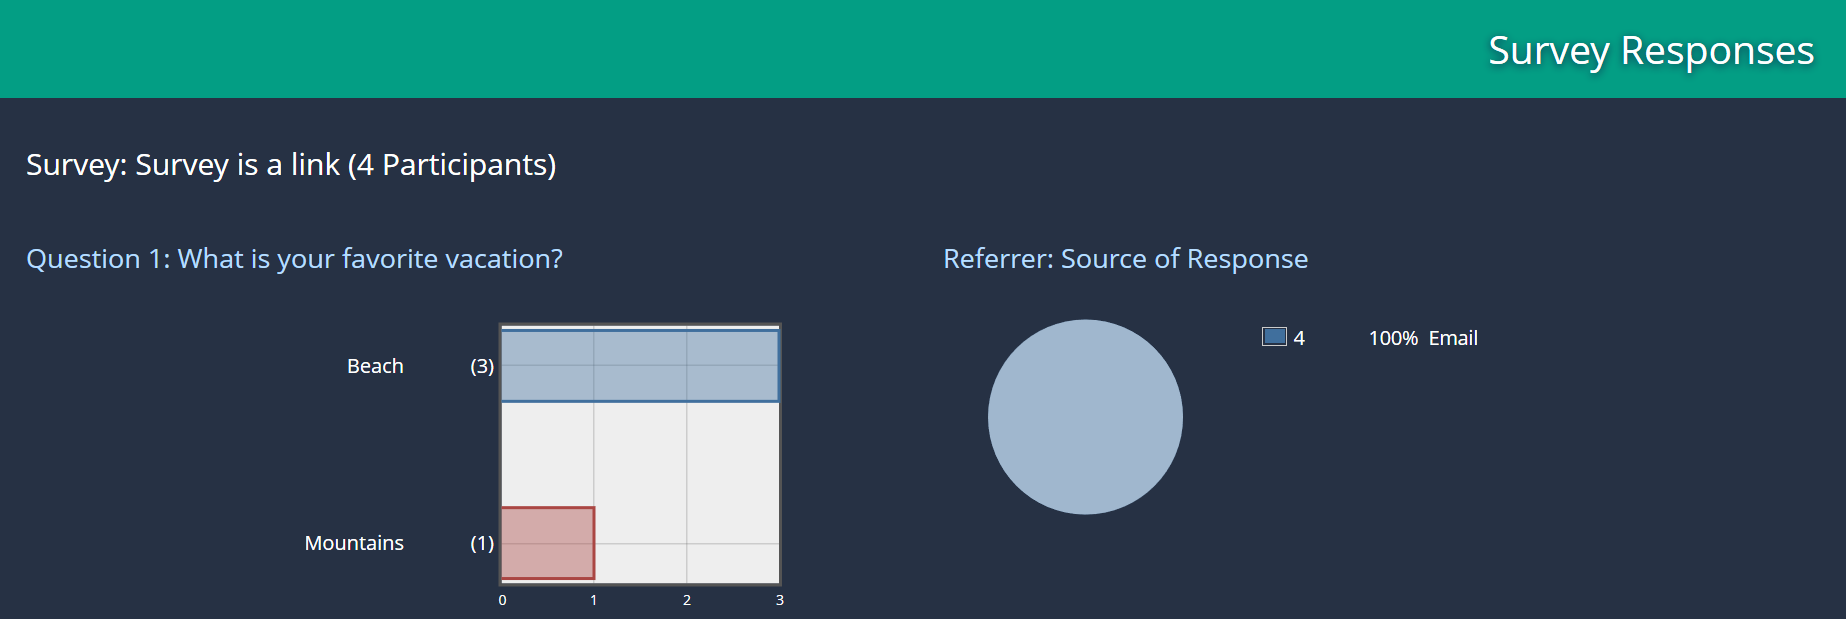
3.Scroll to the bottom of the report to view responses to survey questions if a survey was included in the eNewsletter.
Copyright © 2020 Leidos Digital Solutions, Inc (DSI)