
Create a Web Form
You can create Web Forms to generate new records in IQ directly from the people with whom you interact. Web Forms can be created to generate an incoming email, create a Service or an Event record directly in the IQ database. You determine the fields you would like to capture. Once the web form is created, it can be placed on your website and included as a link in the content of an eNewsletter.
Create a Web Form
1.Open the Outreach menu and select Web Form in the New column. (IQ displays the Web Form record in the Setup step)
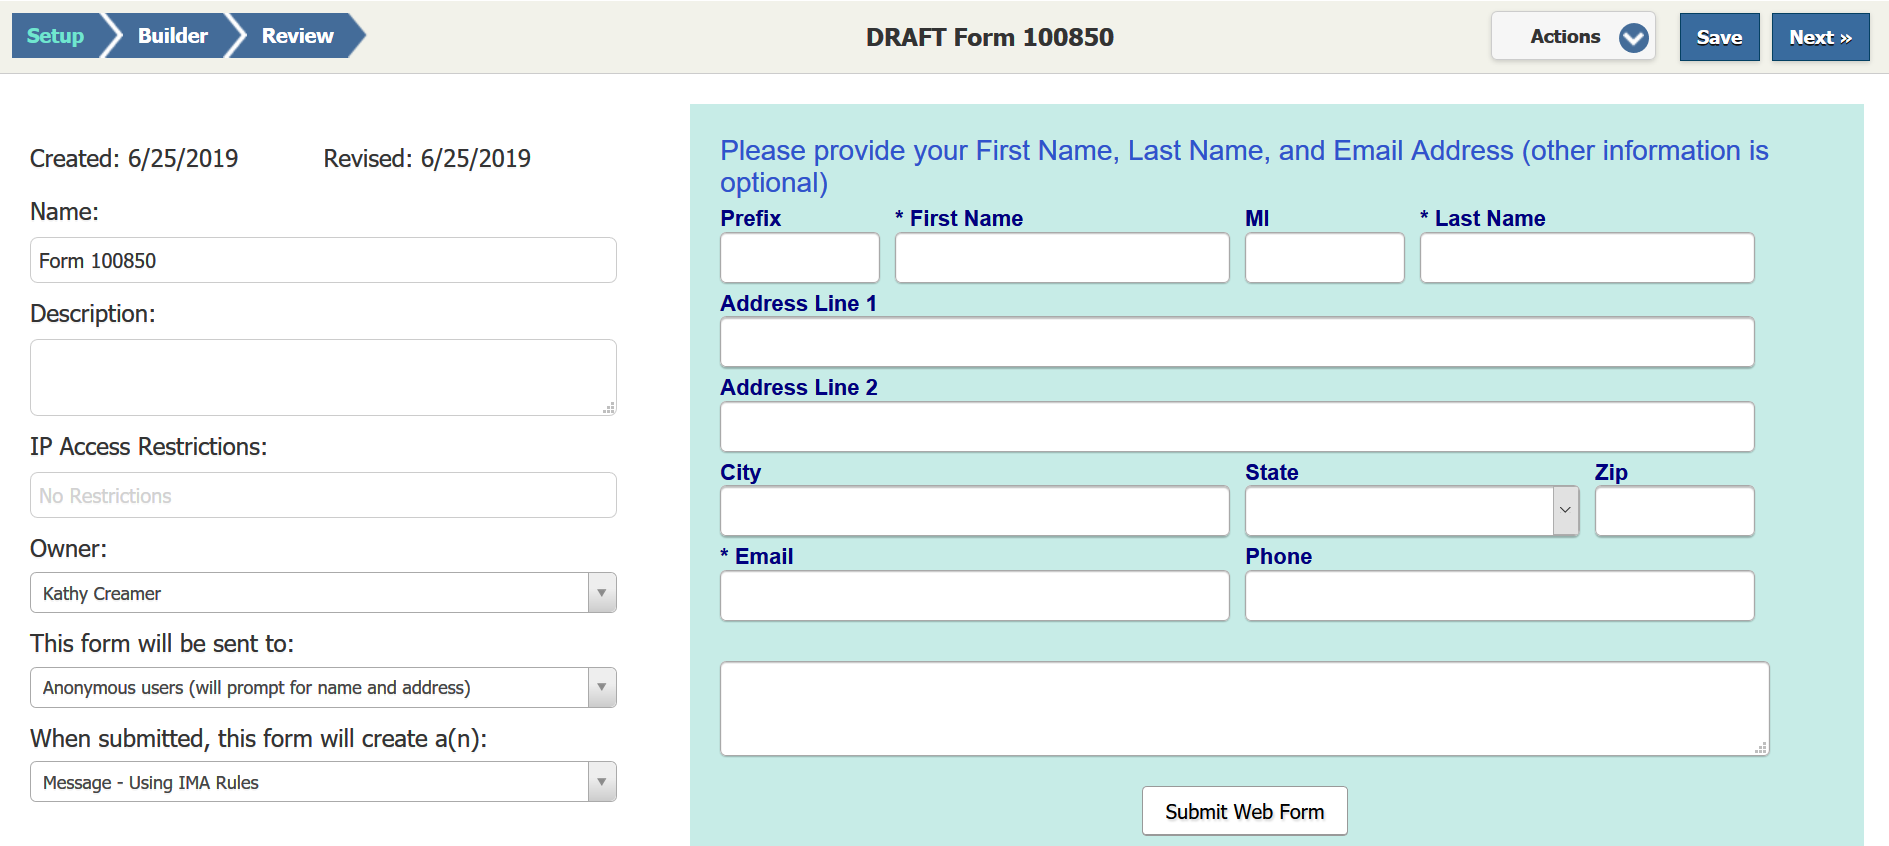
2.The Name field defaults to "Form ######", but you can replace it with a more meaningful name.
3.Use the Description field to provide information about the purpose of the web form.
4.The IP Access Restrictions field can be used to limit access of the web form to specific IP Addresses and/or a range of IPs separated by commas. This is limited to 4000 characters.
5.Your name will appear in the Owner field, however, you can select another IQ user if appropriate.
6.Select whether to send the Web Form to contacts already in the database (using an eNewsletter or other targeted email Outreach) or Anonymous users (typically created as a link on an existing website).
7.Determine whether the Web Form will be used to create an incoming email Message, Service record based on a selected template or an Event record.
8.Select the Next button to continue.
9.In the Builder step, select which information you want to collect in the webform.
•Text Block
•Primary Contact
•Email Subject
•Affiliation Code
•Issue Code
•Message Body
•Message Section
•Attachment
•Survey
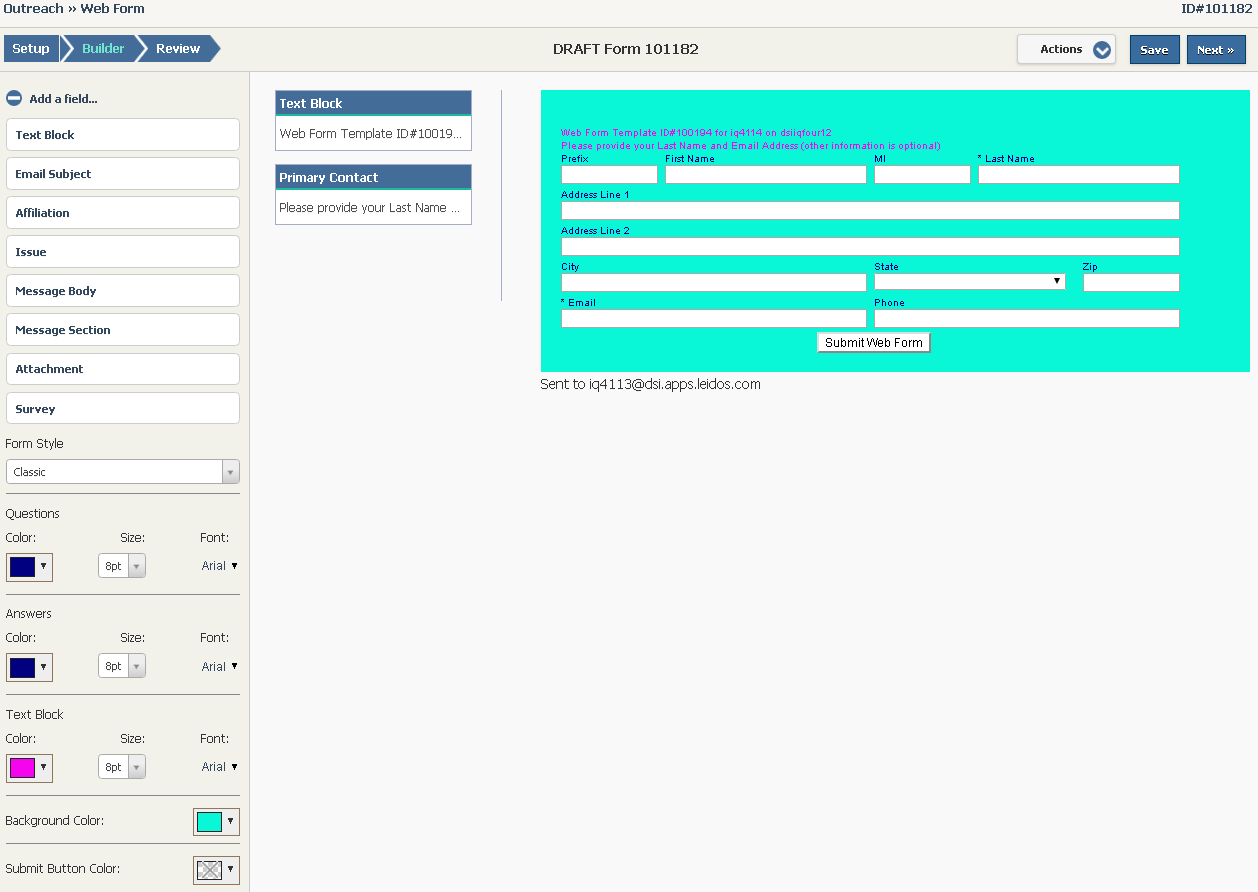
10.Form Style defaults to Classic. Select Modern to change the style.
11.You can change the color of the Questions, Answers and Text Box by selecting a color from the grid or by typing an HTML code in the field below the grid.
12.Select the Font Type and Size for the Questions, Answers and Text Box.
13.Select a Background color.
14.You may select a color for the Submit Button.
15.Determine the type of separator you would like to use between questions.
16.Select the Next button to go to the Review step.
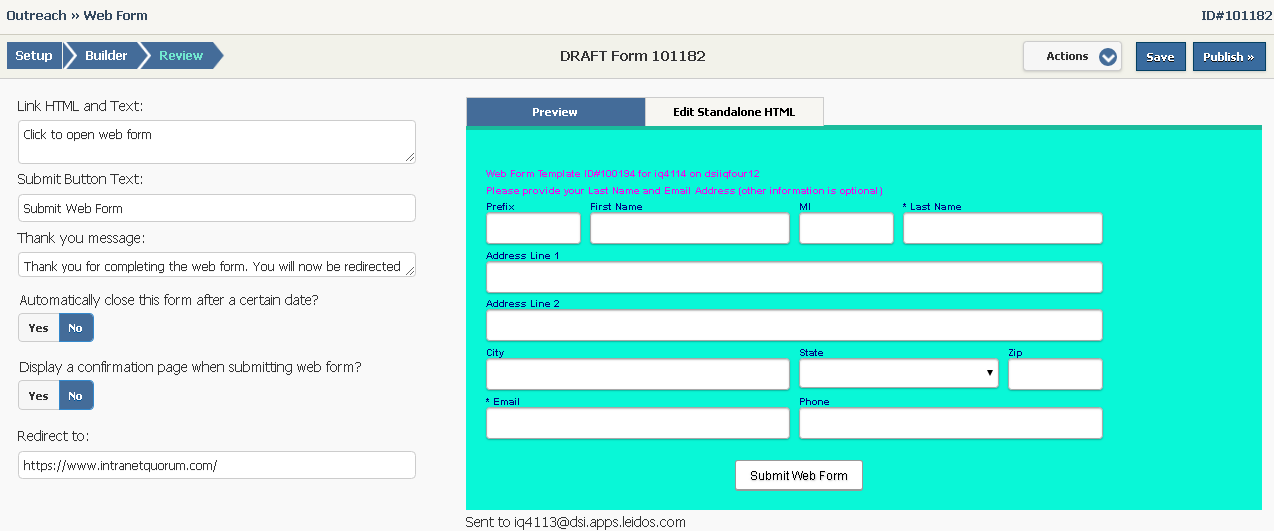
17.The Link and HTML Text displays the URL that will open the web form.
18.Use the Submit Button Text field to control the text that appears for the Submit button.
19.Use the Thank you message field if you would like to display a message after the recipient submits the Web Form.
20.Automatically close form defaults to No. If Yes is selected, then you can set the closed date, enter a closed message text and/or redirect the recipient to a specified website.
21.Select the Yes button for Display a confirmation page when submitting web form? to display a summary page.
22.Enter a URL in the Redirect to: field if the recipient should be redirected to another website after submitting the Web Form.
23.To replace an image, open the Edit Standalone tab. Delete the image and click the IQ Image icon (located in the HTML toolbar) and select another image.
24.Select the Publish button. IQ displays the Publish Web Form to IQ Connect dialog.
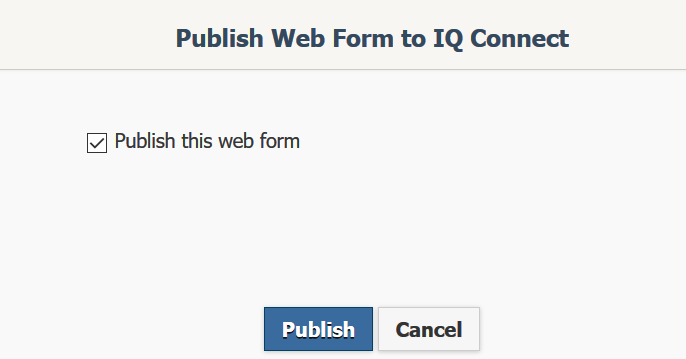
25.Select Publish again. IQ displays the published web form with a URL for sharing and the HTML for embedding the webform.
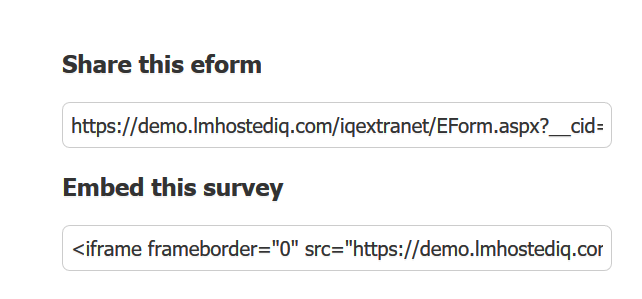
26.You can either use the URL in the Share this Web Form field or the html code in the Embed this survey field to embed the Web Form in an outgoing email or newsletter.
Copyright © 2020 Leidos Digital Solutions, Inc (DSI)