
Installing and Uninstalling IQ Outlook Add-In
Market: Federal/State/Local, House, Senate
Description: These instructions teach users how to install IQ Outlook Add-In, which allows integration between MS Outlook and IQ4.
Click the following link to be brought directly to the subtopic:
Uninstalling IQ Outlook Add In
Configuring IQ Outlook Add In
In order to install the IQ Outlook add-in, you will first need to log into IQ through Microsoft Edge. You will then need to locate the shortcuts menu on the top right of your home page and click it.
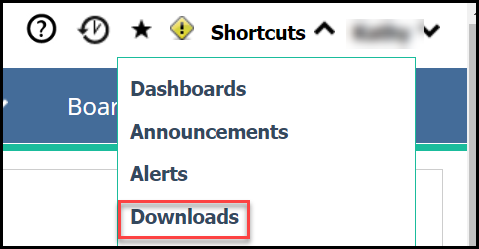
A drop-down menu will appear. Select the Downloads option and a new window will open.
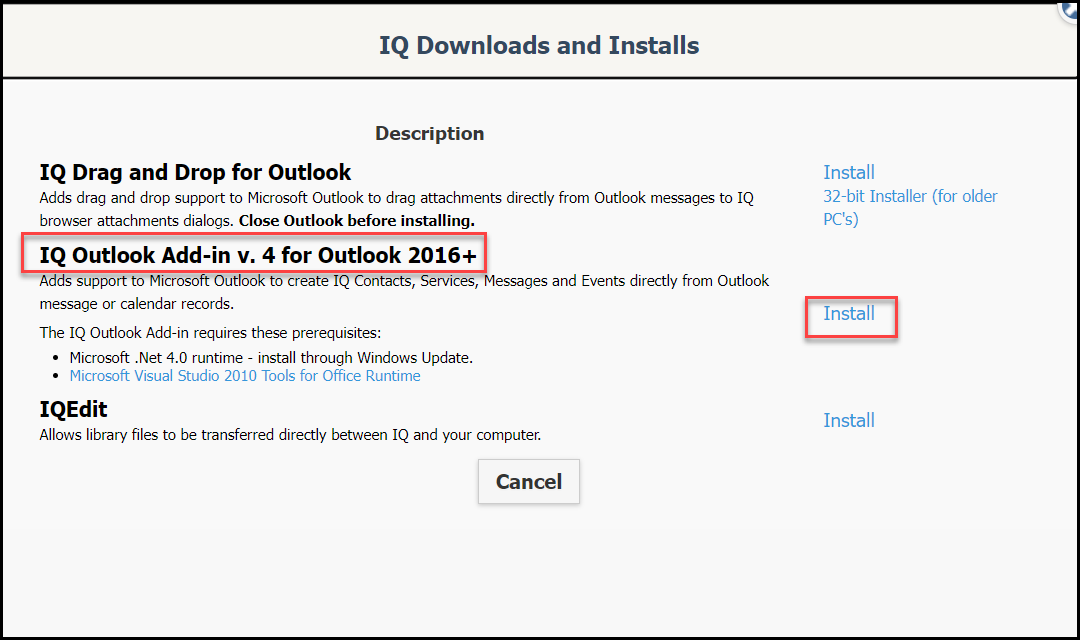
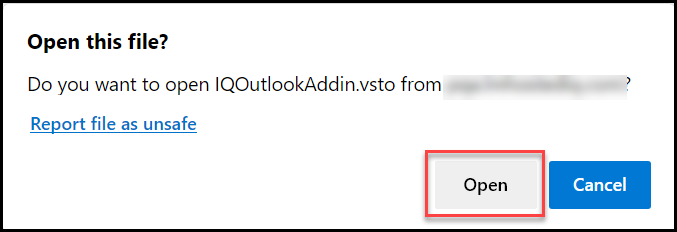
Select the option for IQ Outlook Add-in v. 4 for Outlook 2016+. Click Open on the pop up.
A new window will open. Select the install option. After doing so the add-in will install automatically. Wait a few moments for the installation to finish.
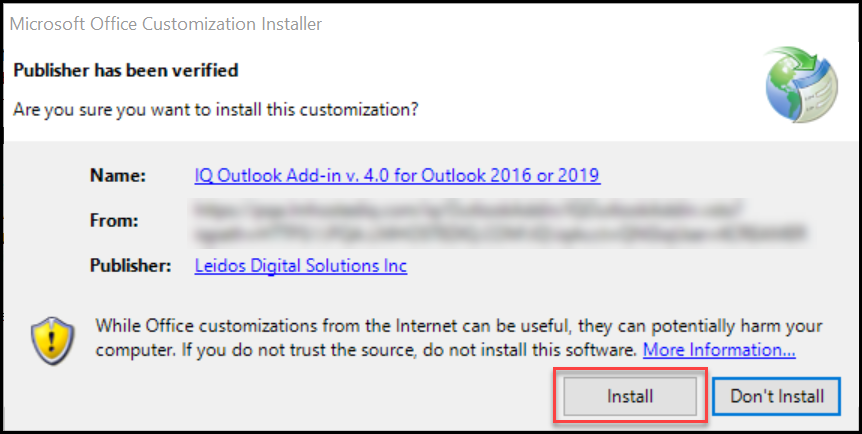
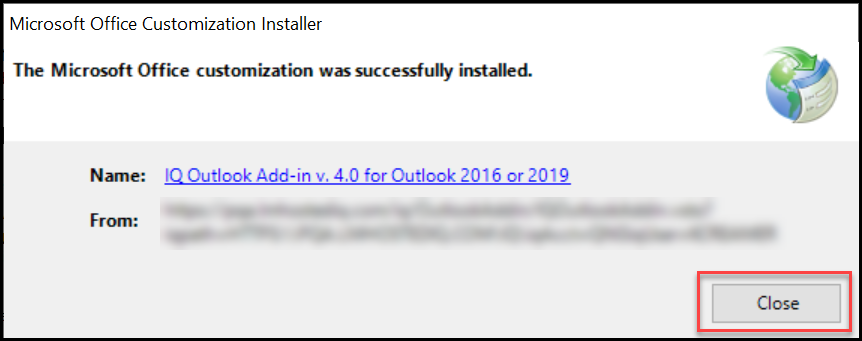
Once installed successfully, close the confirmation window.
If you had Outlook open prior to the installation, you will need to close and relaunch Outlook in order for the add-in to show up.
Navigate the top menu and locate the IQ Add-in option.
After selecting the add-in option, you should see a configure and settings option. Select Configure.

You will now see a screen as shown below.
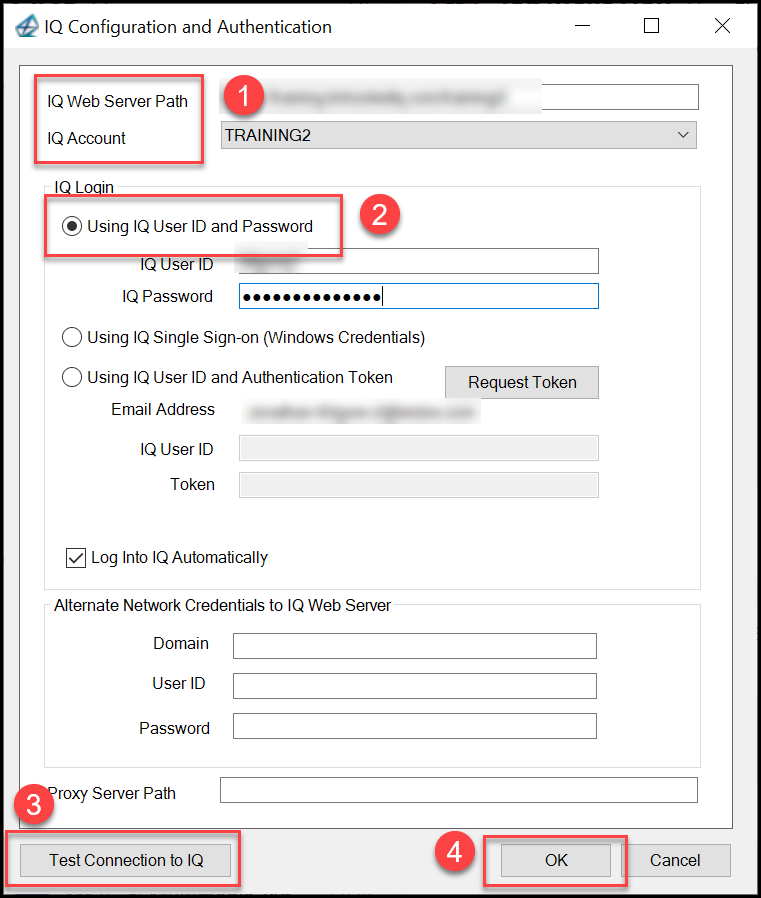
The IQ Web Server Path should auto populate for you. Select the drop-down menu for IQ Account and select the appropriate account. If the option is blank you will need to talk to your IQ Consultant or our Customer Service Center for assistance.
You have three different ways to log into IQ through this screen:
oUsing IQ User ID and Password
oUsing IQ Single Sign-On
oUsing IQ User ID and Authentication Token
If neither Using IQ User ID and Password and Using IQ Single Sign-On work for you, choose the Using IQ User ID and Authentication Token option to log in.
If selecting the Using IQ User ID and Authentication Token option for log in:
Verify that your email is listed and select Request Token.
A new window will open
Verify that the User Login ID, IQ Account ID, IQ Path, and User Email are all correct and select the Confirm Information and Request Access Token option. You will then get another screen with additional token information.
Select the Configure IQ Outlook Add-in to Use the Token option. After selecting the option, you will see that the information is auto filled in the previous Using IQ User ID and Authentication Token window.
Verify that the fields now have information in them and select Test Connection to IQ at the bottom left of this window. After doing so, you will receive a small window that states the information is valid if everything is entered correctly.
When you receive the notification that the credentials are valid, you can now select OK. You can now click the OK option next to the cancel button to verify and proceed. (IMPORTANT: click OK only one time and wait a few seconds for it to load. Multiple clicks may cause the window to error out).
When successful you will now see different options available. You should see Log Out of IQ, Settings, Ready status, and the IQ Upload options available.
You have now successfully installed the IQ Outlook Add-in.
Uninstalling IQ Outlook Add In
Click the Search Bar at the bottom left of your windows screen and type Control Panel. Select Control Panel.
A window named All Control Panel Items will open. If the window is in the View by: Small Icons format, select Programs and Features.
If the window is in the View by: Category format, select Uninstall a program under the Programs option.
After selecting the option, you need now see a window with a list of all your programs. Locate the IQ Outlook Add-in v. 4.0 beta for Outlook 2016 or 2019 program.
Either click the program and Select the Uninstall option, or right click the program and select Uninstall.
A confirmation window will open. Select OK to confirm the uninstallation.
You have now successfully removed the IQ Outlook add-in from Outlook.
Copyright © Leidos Proprietary 2024
.png)
.png)
.png)
.png)
.png)
.png)
.png)
.png)
.png)
.png)
.png)
.png)
.png)